One of the oldest building techniques in existence, dry stone wall (sometimes also referred to as a drystack) involves building walls by simply stacking stones on top of each other. Unlike brick walls, which require wet mortar to hold them together, dry stone walls do not require mortar. These walls simply rely on gravity, as well as the skills of those who build them, for their stability.
In fact, stability is one of the most impressive characteristics of these structures. Well-constructed dry stone walls can be expected to last over 100 years and some even to last 200 years.
This impressive fact, along with several other advantages and their aesthetic appeal, has resulted in an increase in the popularity of dry stone walls here in Australia. These are old examples of this construction method in this country, although there are usually not as many examples here as elsewhere. Maybe this current wave of popularity will change that.
This is because many people are starting to use dry cell batteries for things like stone cladding, dry stone retaining wall, dry stone wall cladding, or a feature wall in an urban setting.

The history of dry stone walls
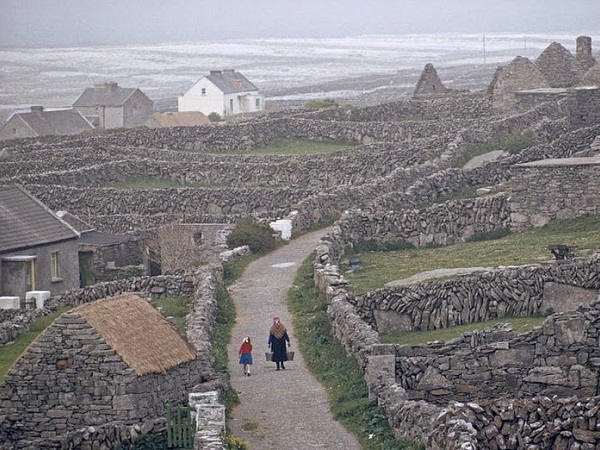
A well-known and beloved feature of the rural landscapes of Great Britain and Ireland, the dry stone walls date back to the Neolithic Age. The first copies date from around 5,000 BC. However, dry stone walls are not limited to England, Scotland, Wales and Ireland. They were also part of the Mayan civilization in South America and can be found all over Europe, Greece and also in Alpine regions.

The pros and cons of dry stone walls – the positives
Appearance – sturdy and almost incredibly rustic, dry stone walls have a timeless aesthetic appeal. On top of that, these walls hold considerable cultural significance to communities in Great Britain and Ireland, the nations in which they are best known.
Ecological – dry stone walls involve the use of readily available natural materials. In cases where the walls are no longer useful, they can simply be deconstructed and the stones used elsewhere. In addition to this, dry stone walls provide habitats for mosses, lichens, etc. They are part of the ecosystem and encourage inner life and more.
Longevity – As already mentioned, evidence of the first dry stone walls has been found more than 5,000 years after their construction and one can expect such walls built today to last a century or more. There is no doubt about its impressive longevity.
Materials – Anytime you build a dry stone wall or fence, there is one thing you can be sure of. You only need one material, stones.

The pros and cons of dry stone walls – the negatives
Work time – Dry stone walls take a long time to build and for this reason they are relatively expensive.
Dependence on skilled labor – In addition to this, dry stone walls are highly dependent on the skills of those doing the work. Poorly constructed dry stone walls simply won’t last. They will collapse.
Applications are limited – Traditionally, dry stone walls were primarily used to manage livestock. While it does this job well, it is limited in terms of fence height. Anything larger than about 1.5 meters is not possible. A larger structure built using this technique would not be stable or secure.
Dependent on a good supply of stone – As mentioned, dry stone walls usually involve locally sourced stones. The problem is, if that supply runs out or just isn’t there, the job stops.
How to build a dry stone wall
Step 1 – Choose the location for your wall and mark it using stakes, string or a similar method. Here it is important to check the width of your larger stones first. This will determine the width of your wall.

2nd step – Dig a six-inch trench that extends an additional six inches beyond where your wall will stand on all sides. Fill this trench with 10 cm of crushed stone as a foundation.
Step 3 – Sort your stones and place them in piles according to their size: small, medium and large. The purpose of this step is to make sure that you are using stones of a similar size side by side and that you also have a good amount of small stones to use as needed to fill in the gaps.
Step 4 – Keeping in mind that the lower levels of the wall should be slightly wider than the others, select stones for your lower layer. Choosing stones of similar size, place them side by side as close to each other as possible and as carefully as possible. Fill in the spaces between these stones with smaller stones. The idea is that all of these stones fit together as tightly as possible, almost like a puzzle.
Step 5 – Once you’ve completed your first horizontal layer, you’re ready to move on to the next layer. Follow the directions from step 4 as you slowly build your wall higher. When you start to lay stones on top of each other, it is important to always make sure that one stone is covered in pairs, much like a normal brick wall. Using this technique maximizes strength and ensures the integrity of your dry stone wall.
Step 6 – Once your wall has reached the desired height, you are ready to lay the top stones, called capstones. This is the only time you have to use mortar. Do this making sure to keep the mortar about six inches from the edge of the wall.

How much does a dry stone wall cost?
As mentioned, traditionally the high cost of dry stone walls was mainly due to the large amount of manpower it requires. In places where an immediate supply of stones is not available, you should add the cost of their supply.
Generally in Australia you can expect to pay around $ 300 per meter for a dry stone wall. And that’s quite a steep price for a retaining wall, siding, etc.
Comments are closed.