.
POP Projects is a collection of new and classic projects from over a century of Popular mechanics. Master the skills, get tool recommendations, and most importantly, create something all your own.
Stone walls have marked boundaries and boundaries defined for millennia. At countless sites, from Hadrian’s Wall in Britain to the Native American ruins of Chaco Canyon in New Mexico, well-designed walls survive a thousand years or more.
Today, stone remains an attractive and durable building material. However, few do-it-yourselfers build with it, in part because it is difficult to transport and heavy to lift. In reality, however, the process is manageable and fun, if you pick the right project.
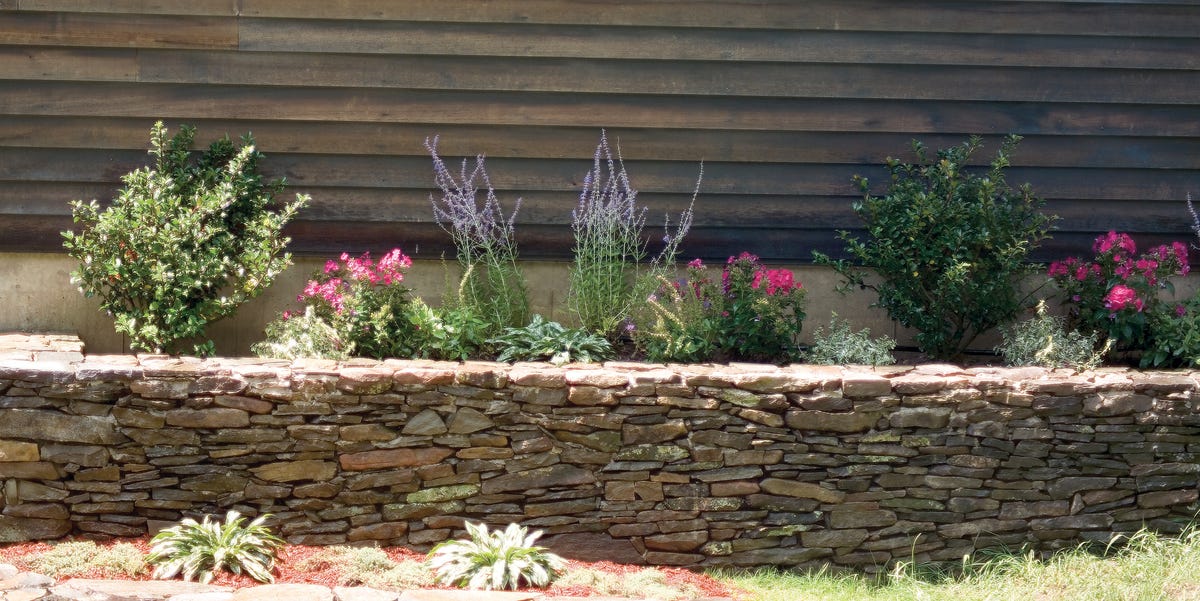
The stone wall planter shown here is functional, beautiful, and relatively easy to build. It is designed to hide an exposed concrete foundation and provide a place to grow plants and shrubs.
We built the planter with flat field stones, sizes ranging from 1 to 3 inches thick and 8 to 18 inches long. Fieldstone is generally sold by the pallet, and each pallet contains approximately 25 cu. Plan to use two pallets for a 10-foot-long planter like ours, and set aside three or four days to get the job done.
To find stone, check with landscapers and garden retailers. If you live in the countryside, you can find supplies from a local farmer, but be prepared to haul it on your own.
These tools will help you


Prepare the spot
Measure 36 ” from the foundation and drive in wooden stakes to represent the exterior of the stone planter. Mark the outline of the wall by sprinkling with white flour [1] along the line of the stakes.
Clear a 12-inch wide x 8-inch deep trench along the inside of the outline. Line the trench with large, thick field stones. Assemble the stones as tightly as possible [2], but do not overlap them.
To ensure that the first row creates a strong and stable base for the stone wall, use a length of 4×4 to drive each stone into the ground [3]. This is the only course that needs to be sifted.
Start the wall
Place the second course by bridging the joints of the stones below [4]. Use long, flat stones in the corners. Do not use mortar in the first five or six courses so that the water in the planter can drain.
With three or four courses in place, set up a string to represent the top of the wall. Drive stakes into the corners of the planter, tie the string to the house and stretch it around the stakes [5].
Hang a level line on the twine to create a level guide line for the top of the wall. Then mark the height of the wall on the stakes [6] and remove the string until the last layers are ready to be laid.
Ensure a good fit
Mix a batch of mortar in a wheelbarrow [7] by combining Portland cement, sand and water, following the directions on the bag of cement. Blend until thick and smooth.
Once the wall is 4-6 inches above the ground, use a sharp trowel to apply the mortar to the back half of the stones [8]. Keep the mortar away from the front to create the appearance of a dry laid wall.
To make sure the stones fit together well, it is often necessary to use a small hammer to break a wedge. [9] or an annoying protrusion.
âš ï¸ Wear eye protection when breaking stone.
Continue to spread the mortar and the stones to be laid, overlapping the joints. After every three or four rows, check that the wall is plumb [10]. Use the hammer to line up the stones.
Finish things
Save the longer, flatter stones for the upper course. Spread the mortar across the width of the course below. Tap the stones to line them up with the layout string [11].
Fill the joints along the top of the wall with mortar [12]. The best way is to use a bag of mortar. Press the mortar into the joints and use a putty knife to smooth the application.
Let the mortar harden overnight, then use a garden sprayer to apply the masonry sealer [13], paying special attention to the top. The sealant will help prevent the mortar joints from cracking.